.svg)


이 워크플로우의 앱


작동 방식
Enhance the functionality of your WordPress website by seamlessly integrating the WP Webhooks plugin with Latenode. This integration offers a solution to a common problem: the need for efficient automation in managing WordPress data and interactions with external services.
Before integrating WP Webhooks with Latenode, managing automation workflows typically involved manual processes or custom development. This often resulted in inefficiencies, increased workload, and potential errors.
With WordPress Webhooks and Latenode integration, you can now automate various tasks such as sending WordPress data to external services or triggering actions in WordPress based on external events. For example, you can automatically update customer records in your CRM when a new user registers on your WordPress site, or you can trigger email notifications to users when specific conditions are met.
This integration empowers website owners and developers to streamline their workflows, reduce manual intervention, and ensure seamless communication between WordPress and external services. By simplifying content management and enabling smooth interactions, this solution enhances user engagement and overall website performance.
What You'll Need:
- WordPress website
- WordPress webhooks plugin
- Latenode account
Step 1: Installing WP Webhooks Plugin
- Download the Plugin:

- Visit the wordpress webhooks page and download the plugin as a zip file.
Installation:
- Navigate to your WordPress website's plugin management page.
- Go to My Site > Plugins > Add New Plugin > Upload.
- Upload the downloaded zip file and install the plugin.
Activation:
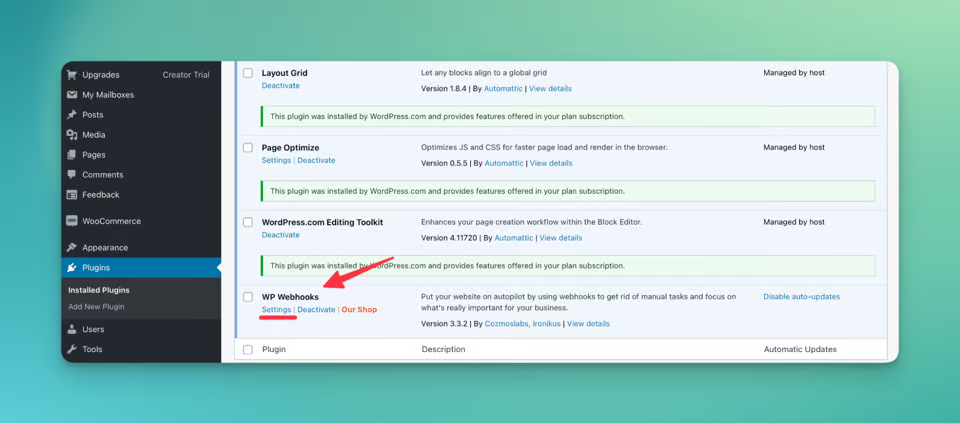
- Once installed, locate wordpress webhooks in your plugin tab.
- Click on Settings to start configuring the plugin.
Step 2: Settings Overview
Send Data:

- Configure triggers for automation workflows.
- Select events that will trigger the execution of automation tasks.
Receive Data:

- Obtain Webhooks Actions URL with an API key.
- Define actions to be performed upon receiving data from external sources.
Step 3: Automating Your Website
- Design Your Scenario:

- Define the automation scenario you wish to implement.
- For example, collecting user comments and storing them in Google Sheets.
Scenario Setup:
- Create a new scenario on Latenode.com
- Rename your scenario for easy identification.
Webhook Trigger Configuration:
- Add a webhook trigger node to your scenario.
- Copy the generated webhook link and configure it in WP Webhooks plugin.
Google 스프레드시트 통합:
- Add nodes to interact with Google Sheets.
- Configure nodes to add, find, and update rows in your spreadsheet.

Iterator Setup:
- Implement an iterator to process data efficiently.
- Connect nodes to iterate through data seamlessly.
Google Sheets: Update Cell x4
At this stage of the workflow, we populate the cells of the spreadsheet with the user's name, email, and comment, while also updating the status from "empty" to "updated". To achieve this, four update cell nodes are required.
Add Update Cell Nodes:
- Click on "add node" and select the "Update cell" node from the Google Sheets options.
- Ensure your authorization token is inserted and choose the spreadsheet's path.
Node Duplication:
- As the actions for all four nodes are identical, you can save time by duplicating one node.
- Right-click on the node, select "copy", and paste it into the desired location.
Node Renaming:
- To avoid confusion, rename each node to distinguish them from one another.
Cell & Value Configuration:
- Configure each node to update the respective cells with the appropriate values
Name:
- Cell: A (googlesheetnumber object from the Iterator)
- Value: comment_author object from the webhook trigger
Email:
- Cell: B (googlesheetnumber object from the Iterator)
- Value: comment_author_email object from the webhook trigger
Comment:
- Cell: C (googlesheetnumber object from the Iterator)
- Value: comment_content object from the webhook trigger
Status:
- Cell: D (googlesheetnumber object from the Iterator)
- Value: updated
Connect Nodes:
- Connect all four nodes to the upper point of the Iterator for sequential execution.
Save Changes:
- Once configured, ensure to save the changes made to the nodes.
Set up HTTP request to WP webhooks Configuration::
The final step of our workflow involves adding an HTTP request node to handle actions such as deleting comments. Here's how to set it up:
Adding HTTP Request Node:
- Add a node to the right connection point of the iterator.
- Look for "HTTP request" in the application list.
Configuring HTTP Request:
- Obtain the Webhook action URL from the Receive Data tab of the wordpress webhook plugin.
- Access webhook wordpress actions and locate the "Delete comment" action.
- Modify the URL by appending "&action=delete_comment" and "&comment_id={comment_id object}" to perform the deletion action.

Setting Method and Saving Changes:
- In the HTTP request node, set the method as GET.
- Save the changes to apply the configuration.
Setting Up Filter:
- To prevent deletion of every comment, a filter needs to be set up.
- Click on the connection between the Iterator and HTTP request, then select "set up filter".
Filter Configuration:
- Insert a name for the filter in the "Label" field.
- In the "condition" field, utilize the "contains" function from the Operators window.
- After the first gap, insert the comment_id object from the webhooks wordpress trigger.
- After the semicolon, insert "https://" to ensure that only comments containing links are deleted.
Testing and Conclusion
- Test the automation workflow by triggering relevant events on your WordPress site
- In case with the comment without the link, the HTTP node wasn’t activated, look:.

- And the one with the comment:

By following these steps, you can create a powerful automation system for your WordPress website using WP Webhooks pro plugin and Latenode. Streamline your workflows, enhance user engagement, and simplify content management with ease through seamless webhooks WordPress integration.
For a ready-to-go template of this scenario, you can access it here. Additionally, feel free to join our Latenode Discord community for further assistance and discussions on automation strategies.
행복한 자동화!
카테고리
AI
IT 및 개발


